
gutenberg
How to Make the Perfect Spooky Zombie Brain Cookies
Creating these spooky zombie brain cookies is a delightful experience that combines creativity with a touch of culinary magic. I love how this recipe allows me to whip up a batch of cookies that not only taste amazing but also look eerily fun. Let’s dive into the step-by-step process to ensure your cookies turn out perfectly!
Step 1 – Prep Your Ingredients Quickly
Before you start, gather all your ingredients and tools. This simple step can save you time and keep your kitchen organized. I like to lay everything out on the counter, so I can easily grab what I need as I go. It’s like setting the stage for a delicious performance!
Step 2 – Begin Cooking
In a large bowl, cream together the softened butter, granulated sugar, and brown sugar until the mixture is light and fluffy. This step is crucial because it incorporates air into the dough, giving your cookies that perfect texture. Then, add the eggs one at a time, mixing well after each addition. Stir in the vanilla and almond extracts for that delightful aroma that fills your kitchen.
Step 3 – Combine Ingredients and Cook
Now, it’s time to mix the dry ingredients. In a separate bowl, whisk together the all-purpose flour, baking soda, and salt. Gradually add this mixture to your wet ingredients, mixing until just combined. Be careful not to overmix; we want our cookies to be soft and chewy! Once your dough is ready, fold in the white chocolate chips for those sweet surprises in every bite.
Using a cookie scoop or tablespoon, drop rounded balls of dough onto a lined baking sheet, spacing them about 2 inches apart. This spacing is important to ensure they bake evenly and don’t merge into one giant cookie!
Step 4 – Final Touches & Serving Suggestions
After baking for 10-12 minutes, your cookies should be lightly golden around the edges. Let them cool on the baking sheet for about 5 minutes before transferring them to a wire rack. Once cooled, it’s time for the fun part! Melt the red and green candy melts according to the package instructions. Drizzle the red candy melts over the cookies to create a ‘blood’ effect, and use the green candy melts to add ‘brain’ details. Finish with a sprinkle of black sprinkles for that extra spooky touch!
These creepy brain-shaped treats are sure to be a hit at your Halloween gathering. Enjoy the process, and don’t forget to have fun with the decorations!
Introduction to Spooky Zombie Brain Cookies
As Halloween approaches, the excitement of creating spooky zombie brain cookies fills the air. These delightful treats are not just cookies; they are a canvas for your creativity, allowing you to transform simple ingredients into something eerily fun and delicious. The thrill of baking Halloween-themed goodies is a tradition that brings joy to both young and old.
What I love most about making these cookies is the opportunity to unleash my imagination. From the vibrant colors of the candy melts to the playful shapes, every step is a chance to have fun in the kitchen. Plus, the best part? You don’t need to be a professional baker to impress your guests. With just a few simple steps, you can create a batch of creepy brain-shaped treats that will leave everyone talking.
For busy adults like us, these cookies are a lifesaver. They require minimal effort while delivering maximum impact. Whether you’re hosting a Halloween party or just want to surprise your family, these cookies are the perfect solution. So, roll up your sleeves, and let’s dive into the world of spooky baking!
Why You’ll Love This Delicious Low-Carb Zombie Brain Cookies Recipe
When it comes to Halloween treats, these spooky zombie brain cookies are a game changer. I can’t emphasize enough how convenient this quick recipe is, allowing you to whip up a batch in no time without sacrificing flavor. In just over half an hour, you can have a tray of cookies that are not only delicious but also visually stunning!
The moment you pull these cookies from the oven, their vibrant colors and creepy designs will have everyone buzzing with excitement. The combination of red and green candy melts creates a striking contrast that makes these cookies a centerpiece at any Halloween gathering. It’s like bringing a piece of art to the dessert table, and trust me, your guests will be impressed!
What I truly appreciate about this recipe is its simplicity. Whether you’re a seasoned baker or just starting out, the straightforward steps make it accessible for all skill levels. You don’t need to be a culinary wizard to create these creepy brain-shaped treats. With just a few ingredients and some creative flair, you can easily craft a spooky dessert that will delight both kids and adults alike.
So, if you’re looking for a fun, quick, and delicious way to celebrate Halloween, these zombie brain cookies are the perfect choice. Let’s get baking and make this Halloween unforgettable!
Ingredients You’ll Need for This Recipe
To create these delightful spooky zombie brain cookies, you’ll need a few essential ingredients that work together to bring your creepy creations to life. Here’s a quick rundown of what you’ll need:
- All-purpose flour: Provides structure to your cookies, ensuring they hold their shape.
- Baking soda: Acts as a leavening agent, helping your cookies rise and become fluffy.
- Salt: Enhances flavor, balancing the sweetness of the sugars.
- Unsalted butter: Adds richness and moisture, making your cookies soft and delicious.
- Granulated and brown sugar: Contributes sweetness and texture, with brown sugar adding a hint of caramel flavor.
- Eggs: Binds all the ingredients together, providing stability to your cookie dough.
- Vanilla and almond extracts: Flavor enhancers that add depth and aroma to your cookies.
- White chocolate chips: Sweet, creamy bites that provide delightful surprises in every cookie.
- Red and green candy melts: For decoration and a spooky effect, transforming your cookies into creepy treats.
- Black sprinkles: Adds a creepy touch, making your cookies even more festive!
For those looking to add a little extra texture, consider incorporating optional ingredients like crushed nuts or dried fruit into the cookie dough. These additions can elevate your creepy brain-shaped treats to a whole new level!
Don’t worry; I’ll provide the exact measurements for each ingredient at the end of this recipe. Let’s gather our supplies and get ready to bake some Halloween magic!
How to Make the Perfect Spooky Zombie Brain Cookies
Creating these spooky zombie brain cookies is a delightful experience that combines creativity with a touch of culinary magic. I love how this recipe allows me to whip up a batch of cookies that not only taste amazing but also look eerily fun. Let’s dive into the step-by-step process to ensure your cookies turn out perfectly!
Step 1 – Prep Your Ingredients Quickly
Before you start, gather all your ingredients and tools. This simple step can save you time and keep your kitchen organized. I like to lay everything out on the counter, so I can easily grab what I need as I go. It’s like setting the stage for a delicious performance!
Step 2 – Begin Cooking
In a large bowl, cream together the softened butter, granulated sugar, and brown sugar until the mixture is light and fluffy. This step is crucial because it incorporates air into the dough, giving your cookies that perfect texture. Then, add the eggs one at a time, mixing well after each addition. Stir in the vanilla and almond extracts for that delightful aroma that fills your kitchen.
Step 3 – Combine Ingredients and Cook
Now, it’s time to mix the dry ingredients. In a separate bowl, whisk together the all-purpose flour, baking soda, and salt. Gradually add this mixture to your wet ingredients, mixing until just combined. Be careful not to overmix; we want our cookies to be soft and chewy! Once your dough is ready, fold in the white chocolate chips for those sweet surprises in every bite.
Using a cookie scoop or tablespoon, drop rounded balls of dough onto a lined baking sheet, spacing them about 2 inches apart. This spacing is important to ensure they bake evenly and don’t merge into one giant cookie!
Step 4 – Final Touches & Serving Suggestions
After baking for 10-12 minutes, your cookies should be lightly golden around the edges. Let them cool on the baking sheet for about 5 minutes before transferring them to a wire rack. Once cooled, it’s time for the fun part! Melt the red and green candy melts according to the package instructions. Drizzle the red candy melts over the cookies to create a ‘blood’ effect, and use the green candy melts to add ‘brain’ details. Finish with a sprinkle of black sprinkles for that extra spooky touch!
These creepy brain-shaped treats are sure to be a hit at your Halloween gathering. Enjoy the process, and don’t forget to have fun with the decorations!
Expert Tips to Ensure Halloween Cookie Success
To make your spooky zombie brain cookies truly unforgettable, I’ve gathered some expert tips that will help you achieve the best results. These simple yet effective strategies can elevate your cookie game and ensure that your Halloween treats are a hit!
- Use room temperature ingredients: Allow your butter and eggs to sit out for about 30 minutes before you start baking. This small step makes a big difference in how well the ingredients mix together, resulting in a smoother dough and a better texture in your cookies.
- Don’t overmix the dough: Once you combine the wet and dry ingredients, mix just until everything is incorporated. Overmixing can lead to tough cookies, and we want our creepy brain-shaped treats to be soft and chewy!
- Experiment with different candy melt colors: While red and green are perfect for a spooky effect, don’t hesitate to get creative! Try using purple, orange, or even black candy melts to create unique designs that will wow your guests. The more colorful, the more fun!
By following these tips, you’ll be well on your way to baking the most delightful and spooky cookies this Halloween. Happy baking!
Essential Kitchen Tools for This Halloween Cookie Recipe
To make your spooky zombie brain cookies a success, having the right kitchen tools on hand is essential. Here’s a list of the necessary tools you’ll need to whip up these creepy treats:
- Mixing bowls: A set of various sizes will help you mix your ingredients efficiently. If you don’t have mixing bowls, any large, deep container will do!
- Whisk: Perfect for combining dry ingredients and creaming butter and sugars. If you don’t have a whisk, a fork can work in a pinch!
- Cookie scoop or tablespoon: This tool helps you portion out the dough evenly. If you don’t have a cookie scoop, a regular tablespoon will suffice; just make sure to keep the portions consistent.
- Baking sheet: A sturdy baking sheet is crucial for even baking. If you don’t have one, any flat oven-safe tray can work, but be sure to adjust your baking time as needed.
- Parchment paper: Lining your baking sheet with parchment paper prevents sticking and makes cleanup a breeze. If you’re out of parchment paper, you can lightly grease the baking sheet with butter or cooking spray.
- Wire rack for cooling: This allows your cookies to cool evenly and prevents them from becoming soggy. If you don’t have a wire rack, you can use a plate or cutting board to cool your cookies, just be sure to space them out!
With these essential tools at your disposal, you’ll be well-equipped to create the most delightful creepy brain-shaped treats this Halloween. Happy baking!
Delicious Variations to Customize Your Creepy Brain-Shaped Treats

One of the best parts about baking these spooky zombie brain cookies is the opportunity to get creative with flavors and designs. Here are some fun variations to consider that will make your creepy brain-shaped treats even more exciting:
- Substitute white chocolate chips with dark chocolate: For those who prefer a richer taste, swapping out white chocolate chips for dark chocolate can add a delightful depth of flavor. The bittersweet notes of dark chocolate pair beautifully with the sweetness of the cookie dough, creating a perfect balance.
- Add spices like cinnamon or nutmeg: Embrace the fall season by incorporating warm spices into your cookie dough. A teaspoon of cinnamon or nutmeg can elevate the flavor profile, giving your cookies a cozy, autumnal twist that’s perfect for Halloween gatherings.
- Use different shapes or colors of candy melts: While the classic red and green candy melts are perfect for a spooky effect, don’t hesitate to experiment! Try using purple, orange, or even black candy melts to create unique designs. You can also use cookie cutters to shape your cookies into different Halloween-themed figures, like ghosts or pumpkins, for added fun!
These variations not only enhance the flavor and visual appeal of your zombie brain cookies but also allow you to personalize them for your guests. So, let your creativity run wild and make these treats truly your own!
Best Keto-Friendly Sides & Beverage Pairings
When it comes to serving your spooky zombie brain cookies, pairing them with delicious keto-friendly sides and beverages can elevate your Halloween gathering. Here are some easy and complementary options that will keep your guests satisfied while sticking to their low-carb lifestyle:
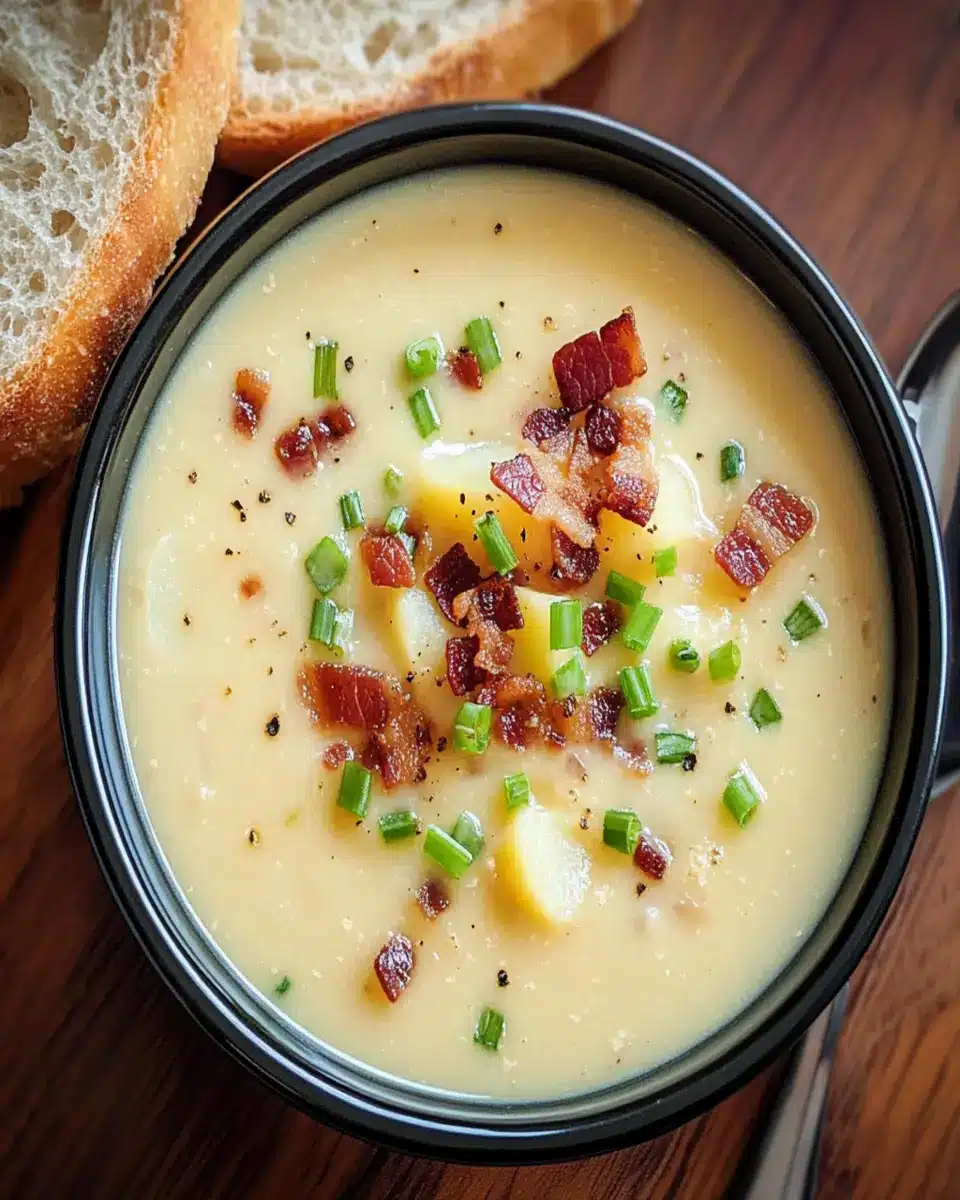
- Pumpkin soup: This savory side is perfect for fall and Halloween. A creamy pumpkin soup, seasoned with spices like cinnamon and nutmeg, not only warms the soul but also complements the sweetness of your cookies. Plus, it’s a great way to incorporate seasonal flavors!
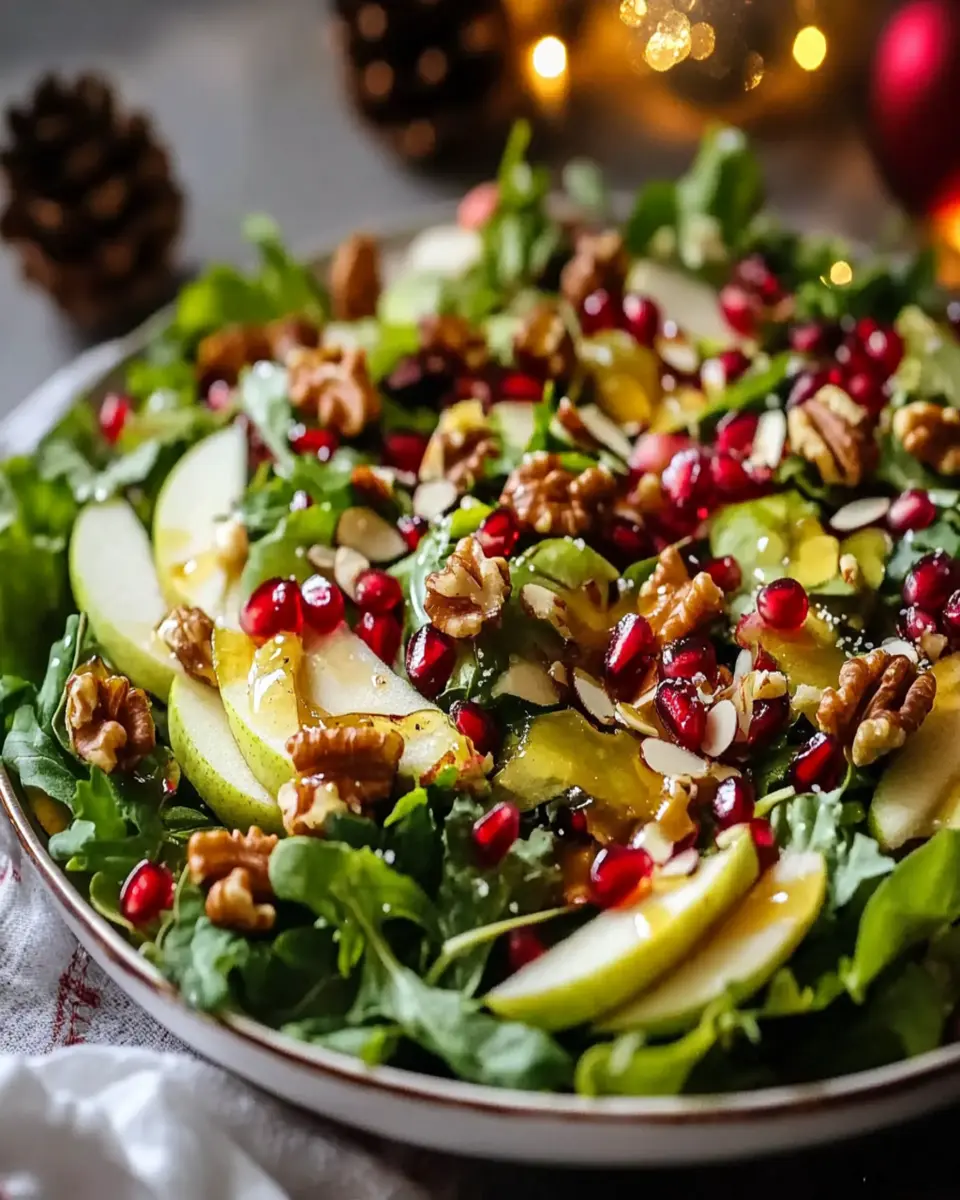
- Cheese platter with assorted nuts: Create a stunning cheese platter featuring a variety of cheeses, such as cheddar, brie, and gouda, paired with an assortment of nuts like almonds, walnuts, and pecans. This combination offers a satisfying crunch and rich flavors that balance the sweetness of your creepy brain-shaped treats.
- Low-carb beverages: Keep your drinks refreshing with options like sparkling water infused with lime or lemon. This bubbly beverage is not only hydrating but also adds a zesty kick that pairs beautifully with your Halloween cookies. For a festive touch, consider adding a splash of sugar-free cranberry juice!
These keto-friendly sides and beverages will not only complement your zombie brain cookies but also create a well-rounded Halloween feast that everyone can enjoy. Happy hosting!
FAQs About Making Spooky Zombie Brain Cookies at Home
As you embark on your journey to create these spooky zombie brain cookies, you might have a few questions. Don’t worry; I’ve got you covered! Here are some common queries and their answers to help you along the way:
- Can I make the dough ahead of time? Absolutely! You can prepare the cookie dough in advance and store it in the refrigerator for up to 3 days. Just make sure to wrap it tightly in plastic wrap or place it in an airtight container. When you’re ready to bake, simply scoop and bake as directed!
- How do I store leftover cookies? To keep your creepy brain-shaped treats fresh, store them in an airtight container at room temperature for up to a week. If you want to keep them longer, consider refrigerating them, but be aware that this may affect their texture.
- What can I use instead of candy melts? If you can’t find candy melts, you can substitute them with melted chocolate or white chocolate. Just be sure to temper the chocolate properly to achieve a smooth consistency for drizzling. You can also use colored icing for decoration!
- Can I freeze these cookies? Yes, you can freeze your zombie brain cookies! Once they are completely cooled, place them in a single layer in an airtight container or freezer bag. They can be frozen for up to 3 months. When you’re ready to enjoy them, simply thaw at room temperature.
With these FAQs answered, you’re all set to create your own batch of spooky zombie brain cookies! Enjoy the baking process and have fun sharing these delightful treats with friends and family this Halloween!
Final Thoughts on This Easy Keto-Friendly Spooky Zombie Brain Cookies
As we wrap up this delightful journey into the world of spooky zombie brain cookies, I encourage you to give this recipe a try! There’s something truly magical about baking, especially when it involves creating treats that are both fun and delicious. I can’t wait to see how your cookies turn out!
Baking these creepy brain-shaped treats is not just about the end result; it’s about the joy of the process. The laughter shared in the kitchen, the creativity unleashed with every drizzle of candy melts, and the excitement of presenting your spooky creations to friends and family are what make Halloween special. So, roll up your sleeves and let your imagination run wild!
I’d love to hear about your experiences with this recipe. Did you add your own twist? How did your guests react? Please share your thoughts in the comments below or tag me on social media with your spooky cookie creations. Let’s celebrate the joy of baking together this Halloween!
“`
PrintSpooky Zombie Brain Cookies: Delight Your Halloween Guests!

Delight your Halloween guests with these spooky zombie brain cookies that are both creepy and delicious!
- Prep Time: 20 minutes
- Cook Time: 12 minutes
- Total Time: 32 minutes
- Yield: 24 cookies 1x
- Category: Dessert
- Method: Baking
- Cuisine: American
- Diet: Vegetarian
Ingredients
- 2 1/2 cups all-purpose flour
- 1 teaspoon baking soda
- 1/2 teaspoon salt
- 1 cup unsalted butter, softened
- 1 cup granulated sugar
- 1 cup brown sugar, packed
- 2 large eggs
- 1 teaspoon vanilla extract
- 1/2 teaspoon almond extract
- 1 cup white chocolate chips
- 1 cup red candy melts
- 1/2 cup green candy melts
- 1/4 cup black sprinkles
Instructions
- Preheat your oven to 350°F (175°C). Line a baking sheet with parchment paper.
- In a medium bowl, whisk together the flour, baking soda, and salt. Set aside.
- In a large bowl, cream together the softened butter, granulated sugar, and brown sugar until light and fluffy.
- Add the eggs one at a time, mixing well after each addition. Stir in the vanilla and almond extracts.
- Gradually add the dry ingredients to the wet ingredients, mixing until just combined. Fold in the white chocolate chips.
- Using a cookie scoop or tablespoon, drop rounded balls of dough onto the prepared baking sheet, spacing them about 2 inches apart.
- Bake for 10-12 minutes, or until the edges are lightly golden. Remove from the oven and let cool on the baking sheet for 5 minutes before transferring to a wire rack to cool completely.
- Once cooled, melt the red and green candy melts according to package instructions. Drizzle the red candy melts over the cookies to create a ‘blood’ effect, and use the green candy melts to add ‘brain’ details. Sprinkle black sprinkles on top for a spooky touch.
Notes
- For a fun twist, try adding crushed nuts or dried fruit to the cookie dough for added texture.
- You can also substitute the white chocolate chips with dark chocolate chips for a richer flavor.
Nutrition
- Serving Size: 1 cookie
- Calories: 210
- Sugar: 15g
- Sodium: 150mg
- Fat: 10g
- Saturated Fat: 6g
- Unsaturated Fat: 4g
- Trans Fat: 0g
- Carbohydrates: 30g
- Fiber: 1g
- Protein: 2g
- Cholesterol: 30mg


Leave a Comment